
So you’ve learned to lead climb. You’ve been outside a time or two. You know what an anchor is, you’ve learned how to rappel, and you’re feeling pretty good about your single-pitch self.
But you’re seeing all these Instagram photos of climbers dangling hundreds of feet of the ground, rappelling off of giant cliffs, and topping out huge lines.
You’re ready to take the next step. You’re ready to start multi-pitch climbing.
One of the magical parts of climbing is that it takes you places where only the birds and the bugs normally go — and for the really tall stuff, you’ll need more than one rope-length to get there. In most areas, multi-pitch climbing unlocks new cliffs and vast amounts of new terrain.
We’ll cover the basics of what you need to get going: how to prepare, what gear you’ll need, the step-by-step process of multi-pitch climbing, and other logistical issues.
Before We Begin, Two Important Things to Stress
- Reading and theorizing are all well and good, but they’re no substitute for practice and understanding. Understand your systems, your equipment, and your intentions well before you have to put them into practice halfway up a wall. Find a way to practice the skills you need (more on this later).
- The majority of the multi-pitch climbing in the USA requires trad gear. Learning to place gear and build anchors is beyond the scope of a single article (despite a plethora of books on the subject, the debate on anchors continues to rage). If you’re a competent single-pitch trad climber, you’re likely well on your way. And if you happen to live in an area where there’s some approachable multi-pitch sport climbing nearby, lucky you — you have an easier, less-committing venue in which to learn. My first ever multi-pitch climb was this aptly-named ramble in Boulder Canyon.
Like much of climbing, these skills are not to be taken lightly. To make sure that we’re providing you with the best possible advice, I hopped on the phone with Eric Whewell, IFMGA-certified guide and Head Guide at Colorado Mountain School. Throughout the article, he’ll be providing the perspective and expertise of a professional.
Preparation: How to Do Your Homework Properly to Minimize Risk
Eric Whewell took special care to point out that much of the work in climbing a multi-pitch route has to take place before the climbing begins.
“People typically don’t plan well enough for their route,” he says. “Maybe they haven’t done enough research about where the climb starts, or where the climb goes, or how to get off the climb. Maybe they didn’t bring the correct amount of equipment, or the correct shoes, or they didn’t bring a second rope to rappel.”
In short:
Do your homework.
“Big-picture planning is something that shouldn’t be taken lightly when you’re moving to the multi-pitch world,” says Whewell.
Here are 7 things to do to plan ahead for your first multi-pitch climb:
- Do as much research as you can before you go onto the route. Study the route — where it begins, where it travels, and where it ends.
- Study how to get down. If you’re rappelling, find out where the anchors are.
- Have a copy of the topo or guidebook with you when you do the climb
- Ask any friends that have done the climb to give you beta
- Look for information on how long you’re going to be on the climb
- Know exactly what gear you’ll need for the approach, climb, and descent
- Be ready for the terrain that you’ll encounter — that way, you’ll know exactly what to do when you get there.
Multi-pitch Climbing Gear List

Here’s a basic checklist of what gear you’ll need:
- Climbing rope (or two, if you need to double-rope rappel)
- Climbing shoes (relatively comfy ones)
- Approach shoes (hopefully light ones, if you’re carrying them with you)
- Harness
- Chalk bag (unless you’re one of the crazy few who are above such things)
- Climbing helmet
- Protection — quickdraws for sport, or sufficient gear for trad
- Belay device (one that can handle belaying from above)
- Anchor supplies — cordelette, slings, or just your rope. Pick your poison, but know it well.
- 2-5 locking carabiners each (for belay devices, anchors, clove hitches, prusiks, etc.)
- Sufficient food and water
- Appropriate layers (prepare for any likely or possible weather)
- Prusik cord, hollow block, or emergency ascender (better to have it and not need it…)
- Sunscreen, watch, headlamp, sunglasses, hand warmers, or other wilderness essentials (depending on location, objective, weather, etc.)
- Topo, guidebook, or printout for your planned routes
- A way to carry all of the above (a climbing pack, clever harness clips, etc.)
- A willing partner
Getting Started

One of the most important steps of multi-pitch climbing takes place before you even leave the ground — right when you’re tying in.
You and your partner will be belaying each other up the climb, so when you tie in at the bottom, each of you ties in on one end of the rope.
Flake the rope first. You don’t want to be halfway through the first pitch only to find a knot in the middle.
Once you’re both tied in, you’re in it together. Barring emergency circumstances, neither of you will untie until the climb is completed. Enjoy the symbolism, and trust your partner.
Leading the First Pitch, Constructing Your Anchor, & Anchoring Yourself in
Okay, so now you’re ready to embark on your multi-pitch. The first pitch is just like the single-pitch you’re used to. You lead up, clipping bolts or placing gear, until you reach the first belay.
Now what?
The first order of business is to secure yourself. If you need to, you can clip a draw or a piece of gear while you build your anchor.
If you’re on a trad climb, build your anchor according to your own systems and whatever the circumstances demand. Many climbers carry a cordelette, which is an 18-25 ft length of 6-7 mm cord, tied into a loop.
“Typically the cordelette offers the most in terms of simplicity and functionality,” says Whewell. But different climbs can call for different tools.
We won’t cover how to build anchors in this article, but there are a variety of ways to learn how. Online resources are a great start, but it’s important to put what you learn online into practice. Here are our recommendations on how to do that.
If you’re on a sport climb (as well as some trad climbs), you’ll likely be faced with a typical two-bolt anchor. There are a few different ways to build anchors on bolts, but your best bet is likely the venerable quad.
With a cordelette, quad anchors are solid, easy to construct, quick to set up, and easy to break down. “As long as they’re modern bolts, a quad is probably the best bet,” says Whewell. “I wouldn’t say always, but it’s one of my favorite tools.”
You can learn more about how to build a quad anchor here and here.
Once you’ve built your anchor, you need to attach yourself. For this, you’re going to want to learn the clove hitch. This is a versatile knot with uses in all kinds of anchors and systems.
To attach yourself to your anchor, throw a locking carabiner onto your quad or anchor of choice, and then clove-hitch your end of the rope to it.
Some climbers take along a sling or PAS, but Whewell recommends against it: “I’ll pretty much exclusively tie in with the rope,” he says. “The climbing rope attachment offers us the most adjustability and is the strongest option that we have.”
Clove hitches are excellent for adjustability: simply unweight the knot, shuffle a little rope through one end or the other, and reweight. You can dial in your stance for maximum comfort and efficiency.
Now you’re set: you’ve finished your lead, you’ve constructed your anchor, and you’ve successfully anchored yourself in.
Letting Your Partner Know You’re at the Anchor & “In Direct”
It’s time to bring your partner up to join you. In order to do so you have to pull up however much rope is left before their tie-in.
This is going to be difficult while they have you on belay, so you have to find some way of telling them that you’re at the anchor and “in direct.”
The stakes here are high — if your belayer were to somehow get the signal prematurely, they could take you off belay before you’re done climbing. Needless to say, this can be disastrous and fatal.
This means that you have to have a system worked out before you leave the ground. If you’re lucky, the pitches might all be short enough to be within shouting distance.
If so, a quick shout of “[belayer’s name here], off belay!” will do the trick.
Often, however, pitches are long enough or bulged enough to make verbal communication impossible. When this happens, you need a backup plan.
I know some teams who always climb with a pair of walkie-talkies. Other teams might work out a series of rope tugs. In many cases, belayers and climbers will operate on a series of rope signals: if more than 10 feet or so of rope is quickly pulled in, it means that the climber is in direct.
Again, extra care ought to be taken here, and belayers should err on the side of keeping the belay on if unsure. Use a system that works for you and avoids uncertainty.
The larger point here is that communication is one of the most important and most difficult aspects of multi-pitch climbing.
This point is really worth stressing. A good system of communication with your partner is absolutely essential. Far too many climbing accidents occur because of a misunderstanding between climber and belayer. On multi-pitch climbs, belay transitions are mandatory and heights are great. It’s especially important to heed one of climbing’s golden rules:
Always be on the same page with your partner.
Rope Management: Coiling Your Rope Once Your Off Belay
Once you’ve let your belayer know that you can be taken off belay, they’ll do so. You’re now free to start pulling up the rope.
But where are you going to put it? To answer this, we need to talk about rope management.
Rope management is to multi-pitch climbing as vegetable chopping is to cooking. It’s not always fun, it’s often a little tedious, somehow you always mess it up, and the pros make it look so easy.
Have faith. With practice and experience, it gets easier.
Luckily, most belay stances are on some kind of ledge or stance. This makes life easier.
“Even if it’s just a very small ledge, I like to make use of the ledge,” says Whewell. “While I’m coiling it, I’ll try to tamp it down with my feet or hands.” Keeping the coils compact and secure is helpful. Having a rats’ nest dangling down the cliff below you will be a pain later on.
If there’s no ledge to speak of, coil the rope over the small section of rope that you’re tied in on. Whewell says this is his last resort, but at hanging belays there’s sometimes no other option.
Again, try to keep coils neat. Many climbers suggest starting with large coils and gradually decreasing their size to avoid tangling. And when you inevitably get your rope tangled the first few times, don’t get discouraged.
How to Belay from Above
Eventually, you’ll reach the end of the rope (the one your partner is tied into).
If you’re within shouting distance, a quick call of “That’s me!” from your partner will let you know that you’ve reached the end. Otherwise, just pull until you can’t pull anymore.
With the rope successfully (or haphazardly) coiled, you’re finally ready to belay your partner up to you.
You’ll need a belay device that can handle belaying from above. There are plenty: Black Diamond ATC Guide, Petzl Reverso, Mammut Smart, Petzl GriGri 2, Petzl GriGri +, and more. Whichever device you use, be sure you’re comfortable and knowledgeable on how to set it up and use it well.
My belay device of choice for multi-pitch climbing is the ATC Guide, for its lightness, simplicity, and versatility.
There are three ways to belay from above:
- Off the harness
- Through a redirect
- Off the anchor itself
Belaying off the anchor is almost always the best option. Are there situations when other options can be useful? “Yeah, but they’re few and far between,” says Whewell. “From a modern rock climbing perspective, 99% of the time I want to belay directly off the anchor.”
To do so, set up your chosen device on another locking carabiner attached to your anchor (don’t use the one you’re already clove-hitched into). The exact set up varies from device to device, but it frequently requires an extra locking ‘biner — make sure you take enough of them with you.
Again, communication is critical here.
You don’t want your partner to start climbing before you’ve put them on belay. When possible, a shout of “[Partner’s name here], on belay!” will work. Otherwise, use whatever system you’ve worked out ahead of time.
One simple possibility: have your belay device ready and waiting while you’re pulling the rope, and put your partner on belay efficiently when you reach the end.
When your partner sees you pull in the last of the rope, they can wait a minute or so and then move slightly upward (while still secure at the ground or previous anchor). If the rope tightens with them, they know they’re on belay.
Setting up your partner’s belay from above is one of those moments when you need to be sure to check your work.
It’s just you up there — there’s no one to double-check your system or point out a mistake.
Double-check it yourself. Then triple-check it, just to be sure. Make sure your carabiners are locked and in the correct position. Make sure your ropes are loaded properly.
When belaying your partner, make sure to stay attentive. There can be a lot of distractions at multi-pitch belays (not the least being that you’re frequently hungry, thirsty, or in bodily need). Your partner can always shout “Up rope!” at you if too much slack builds up, but an inattentive belayer is no fun.
Stay efficient and attentive and your day will run more smoothly.
The Transition
Your partner, bravely toprope-hero-ing their way up that insanely bold pitch you just led, has made it up to you. You’re together again, a full pitch off the ground.
This brings us to another crucial point: the transition.
During this time, both climbers are stationed at the anchor preparing for the next pitch. Gear is re-racked, water is sipped, and the belay is switched.
First Decide How to Divvy Up Who Leads & Who Follows
There are two possible ways to divvy up multi-pitch leads:
- Swing leads
- Lead in blocks
Swinging leads means that partners alternate. If you led the first pitch, your partner will lead the second pitch.
This means that belay and climbing blocks are longer. After you belay your partner from above, you belay them again as they lead the next pitch.
If leading in blocks, one climber will lead multiple pitches in a row with the other climber following each one. In some cases one climber will do all the lead climbing, though generally lead blocks are divided up between partners.
Both approaches have pros and cons. Swinging leads is traditional and efficient, and it means that you get a break from being on the sharp end. Climbing in blocks can allow leaders and followers to get in the zone for long periods, and with practice it can be equally efficient.
Whewell points out some additional considerations: “If being cold is an issue, leading in blocks tends to make the most sense (to stay warmer). Other times, I’d lead in blocks if one person in the party is stronger and they want to lead a few pitches in a row. Oftentimes I’ll swing leads, and that’s the traditional method.”
Depending on which approach you choose, your transitions will differ slightly.
If you lead in blocks, your partner will clove-hitch themselves into your anchor, hand you whatever gear they cleaned from the last pitch, and then flip the rope.
Flipping the rope is a crucial step. You have just flaked it with your end at the bottom, so in order for it to feed smoothly as you lead, you’ll need to flip it. This is where rope management can get especially tricky.
After the rope is flipped, your partner can put you back on belay, and you can unclip your clove hitch and be on your way.
If you’re swinging leads. Your partner will arrive at your belay station, and you’ll have two essential tasks to complete:
- Get your partner the gear they need
- Put them on belay
For a variety of reasons, belaying off the harness is almost always preferable when a climber is leading up from an anchor.
One neat way to save time is to carry the same belay device as your partner — that way, when they arrive at the belay station, you can simply grab their belay device, put on a harness belay below the one set up on your anchor, and then remove the anchor belay.
Your partner is never off belay, and you can hand them your belay device to take up to the top of the next pitch. If this isn’t an option or you both need a little more time at the anchor, just have them clove-hitch in on another locker.
There are a variety of ways to transfer gear and streamline transitions. There are articles, classes, and a whole lot of snarky forum comments on the subject.
The most important thing?
“Being on the same page with your partner,” says Whewell. “A lot of people use a lot of different techniques, but just be well-practiced with your partner.”
Fall Factor: A Little Bit of Climbing Math
You’ve completed your transition, given your partner the gear they need, sipped a little water, and set up a belay on your harness. Your partner is now all set to lead the next pitch.
We’re going to take a quick detour here to talk about some math — the ominously named fall factor.
Fall factor is a measure of how severe a climbing fall is, and the calculation is simple: divide the distance you fell by the amount of rope in the system.
Fth = Fall length / Rope length
Fth = theoretical fall factor
Fall length = length of the climber’s fall
Rope length = length of rope between belayer and climber
As long as a good length of rope is in the system, most climbing falls have a fall factor below 1.
The most severe possible fall would have a fall factor of 2. In this scenario, you’ve started leading above the anchor, but you fall before clipping any gear. You fall back to the anchor and then past it — twice the length of however much rope was paid out at the time.
This is a situation that you want to avoid at all costs.

Factor-2 falls are the most severe load that you can put on your anchor. In the worst-case scenario, your anchor could fail, which means that your team is coming off the mountain.
Even if you’re falling on two modern stainless bolts that could sustain a factor-2 from a pair of elephants, you’re still going to take your belayer for a nasty jerk.
To mitigate this possibility, most sources recommend clipping the uppermost piece of your anchor as your first piece of the pitch. There are some rare scenarios where this might not be preferable, but it’s generally a good idea.
Place or clip gear as soon as possible once you’ve left the belay, and take special care during this stretch. Falls here can be especially treacherous. You can read some more about fall factors here.
The Duties of the Follower
Assuming all goes well, your partner will embark on their next lead, clip their first piece early and safely, and successfully lead up to the next belay station.
They’ll repeat the same process you went through at the first anchor (if you’re constructing anchors using a cordelette, note that you’ll need a second one). They’ll go in direct, communicate that to you somehow, and then pull up the rope and put you on belay.
Now it’s your turn to be the follower.
As discussed earlier, it’s generally a good idea to take a quick step upwards to make sure that you’re on belay. If the rope tightens as your partner belays, you’re good to go.
You can then unclip your clove hitch, clean whatever gear was in your anchor, and rack it on your harness before starting the pitch.
While following, one of your crucial duties is to clean and rack gear as you go. This is another area that can get tricky. Racking gear is all well and good when you’re stationary, but when you’re pumped and feeling your foot start to slip, fumbling with an alpine draw is the last thing you want to worry about.
Keep it simple here. Have a system that works for you. I prefer to put gear on my harness and throw alpines over my shoulder.
If you’re only cleaning draws, it’s usually pretty easy to put them back on your harness. Some climbers will only unclip or remove the gear end, leaving the hardware dangling above their knot until they reach the next stance or anchor. I find this method to be a little cumbersome, but you can experiment with what works best for you.
When following, it’s a good idea to move quickly. Multi-pitch routes are often more pleasant if you’re swift, and an expeditious follower can speed things up quite a bit. You’re not on lead and you’re not placing gear, so don’t dally. Use all that extra mental space to focus on the climbing.
The one scenario when the follower is also on the hook is during traverses. On a vertical climb, the follower is on toprope for the duration of the pitch. On a traverse pitch, however, the follower will be staring at a fall every time they clean a piece.
Take care during these circumstances. A thoughtful leader will remember to protect traverses effectively for their second, but a follower may need to move carefully through horizontal terrain.

Finishing Up & Descending
From here on it’s just rinse and repeat.
After you follow a pitch, you and your partner will execute another flawless and efficient multi-pitch transition, leaving you ready to lead the next pitch. You can go on leapfrogging each other until you reach the end of whatever climb you’ve picked out for the day.
Congratulations! You made it.
At this point, you still have to worry about getting down. Here we arrive at another golden rule of climbing:
Do not underestimate the descent.
A shocking number of climbing accidents happen while climbers are trying to descend from climbs. Know exactly how you plan to descend before you leave the ground, and make sure you’re equipped to do so.
Favor walk-off descents over rappels — rappels add risk, can dislodge additional rock, and can slow down or obstruct other climbers. If you’re doing multiple rappels, have an efficient and reliable system for transitions, and always (ALWAYS) tie knots in the ends of your rope(s).
At the end of a long climb, you and your partner will often be tired. Do not get complacent. Stay attentive and careful, and make sure that you get down safely.
Weather & Time
“Weather is always a concern when I’m on a multi-pitch rock climb,” says Whewell. Because multi-pitch climbs tend to be longer and more committing than single-pitch routes, the risk of getting hit by weather increases substantially.
If things start to get really epic, you might still be on the climb when the sun is setting.
When you’re halfway up a cliff, these are no small concerns. Wet rock might make it impossible for you to continue climbing. A sudden storm might cut visibility. You might be a long way from shelter and in a very exposed position. With some precipitation, shade, and a little wind, things get cold pretty quickly.

The answer, as always: be prepared.
Bring layers. Check the weather. Move quickly. Bring as much food and water as you’ll need.
These concerns are especially pressing when climbing at high altitude. “Weather in Rocky Mountain National Park tends to be much more of a concern than when you’re in Eldorado Canyon,” says Whewell.
The more remote and alpine your objective, the more ready you should be. And don’t be afraid to bail — better a wet retreat than a stormy epic.
How to Carry Gear on a Multi-pitch Climb
So: you need to carry all those layers and all that food and water (not to mention the topo of your climb).
You might need sunscreen or climbing tape, and you’ll probably want a camera if you want all your friends to see how amazing the view was. If you’re walking off, you’ll also need to get your shoes up to the top with you.
How?
As is so often the case, there are multiple answers here.
Some climbers prefer to hang almost everything on their harness. Many climbing-specific shells and layers will pack into a pocket and have a handy clip-in loop, perfect for attaching to the back of your harness.
You know those funky little half-size Nalgenes that look like they’re made for kids? They’re perfect for clipping to your harness on smaller multi-pitches. Throw some energy bars in one pocket and your topo in the other, and you’re good to go.
If you’re taking your approach shoes with you, it helps to have a light pair that can clip to your harness as well. I have climbed with a pair of hiking boots on my harness, and it’s not a very pleasant experience.
My current favorite lightweight approachers are the La Sportiva TX2, but find whichever ones work best for you.
I’m one of the climbers that prefer to carry a small pack — I like the extra space and versatility. If the load is light enough and the climb is short enough, both climbers can fit their gear in a single pack. Whoever is following carries the pack, and it gets passed back and forth at belay transitions.
If more gear, layers, or supplies are needed, both climbers can carry a small pack. You’ll want something low-profile and light that will stay close to your body as your climbing. I’m a fan of the budget-friendly REI Flash 18, but many companies design packs specifically for this purpose.
When Things Go Wrong
No matter how well we prepare, things don’t always go our way. The weather might suddenly shift. A rock might break loose. You might make your best judgment and have it turn out wrong.
A few things will help here.
Stay realistic and stay positive. Manage your risk. Be prepared for unforeseen obstacles, but recognize when you’ve pushed it too far. Support your partner, and trust them to support you. I can’t overstate the importance of having a partner who can get you back on track when you’re discouraged or panicked.
If things do go wrong, have the skills that you need to survive and react.
It is strongly recommended that you know some basic self-rescue techniques when embarking on any serious multi-pitch climbing.
Articles, videos, and forum threads on the topic abound. Again, practice these skills before you really need them. Ideally, you’ll know things like how to ascend a rope, how to tie a prusik, and how to belay off a Munter.
A full self-rescue rundown is beyond the scope of this page, but I strongly encourage you to familiarize yourself with basic techniques.
Part of what’s wonderful about climbing is the adventure of it. Embrace that adventure, but be clear-eyed and humble about what you’re getting yourself into (and the risks involved). Be prepared for whatever you might encounter along the way.
Parties of Three
Climbing with a party of two is one of the most basic and efficient methods, but you might find yourself wanting to bring another friend.
In some circumstances (committing alpine expeditions or big walls, for example), parties of three bring substantial advantages. The mental load is shared, you’re alone less of the time, and the duties at transitions can be delegated even further.
There are several methods of climbing with three, depending on your objective and needs.
Sometimes the leader will belay both followers at the same time. Sometimes one follower will clean while the other jugs up a fixed line. As usual, do your research and know your systems. It is certainly possible (and sometimes very fun) to climb efficiently with larger parties.
Putting What You’ve Learned into Practice
An article like this one can, at best, provide a theoretical outline for how to get going. How are you going to learn and practice all these skills?
“Seek mentorship from people who are experienced,” says Whewell. Mentors are an essential part of the climbing community, and they’re one of the best ways to literally learn the ropes.
That could mean getting an experienced friend to lead you up a moderate climb. It could mean sucking up the courage to ask that grizzled old-timer at your local climbing gym to show you a thing or two, and then repaying him with six packs or sandwiches.
Even better, find some classes or a guide service. Many local services have courses on learning to lead trad or multi-pitch climbs, and they’ll give you a hands-on environment with an experienced guide.
“Finding a mentor can take a long time,” says Whewell, “and coordinating your schedules can take a long time. The most expensive — and most productive — is to hire a mountain guide to specifically cover the skills that you want to learn. You can tailor the curriculum to exactly what you want to learn about.”
Resources online and in books are common, but they’ll only get you so far.
“Learning from books and videos is better than it ever has been, but it’s still not quite as good,” says Whewell. That’s no reason to stop reading or doing research, but in the end you’ll need to find a way to get comfortable with these skills on real rock. Whether it’s with friends, with a guide, or in some low-pressure setting is down to your personal style and needs.
This is a matter of both courtesy and safety. You don’t want to be the gumbies slowing down all the parties on your local classic, and you especially don’t want to end up in an accident report.
One more time, for the people in the back: know your systems, be prepared, and have a plan before you get out on the rock.
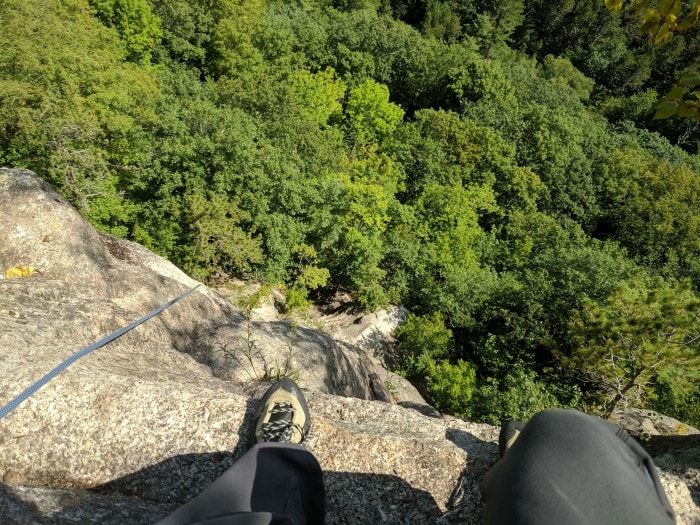
And while you’re there, don’t forget to enjoy the view.
Multi-pitch climbing can take you to some of the most magical places in the world, places where the majority of people will never get to go.
Scaling large cliffs lends a sense of scale that single-pitch climbing lacks. You get to follow in the footsteps of climbing titans and clip the pitons they left behind. You get to feel the joy and tribulation of summits that test you.
It can be a humbling, exhilarating, and beautiful experience. Savor it.

Special thanks to the Eric Whewell of the Colorado Mountain School for lending his time and expertise. CMS offers a variety of courses and clinics on rock, ice, and snow — including courses on trad climbing, anchors, self-rescue, and multi-pitch. You can find them online or at their offices in Boulder and Estes Park.


